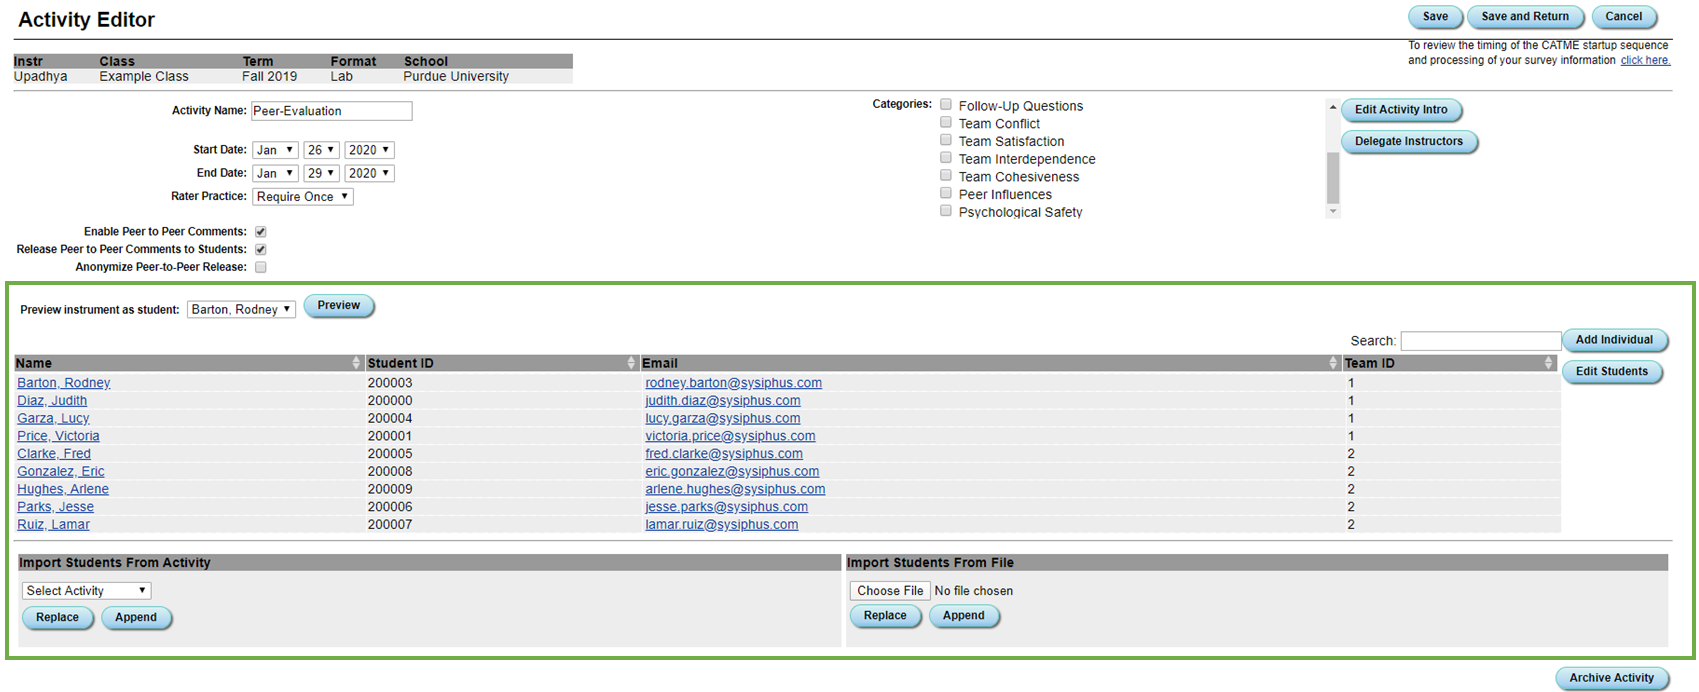
To view your students, simply navigate to the Activity Editor by clicking the activity name and scroll to the list of students.

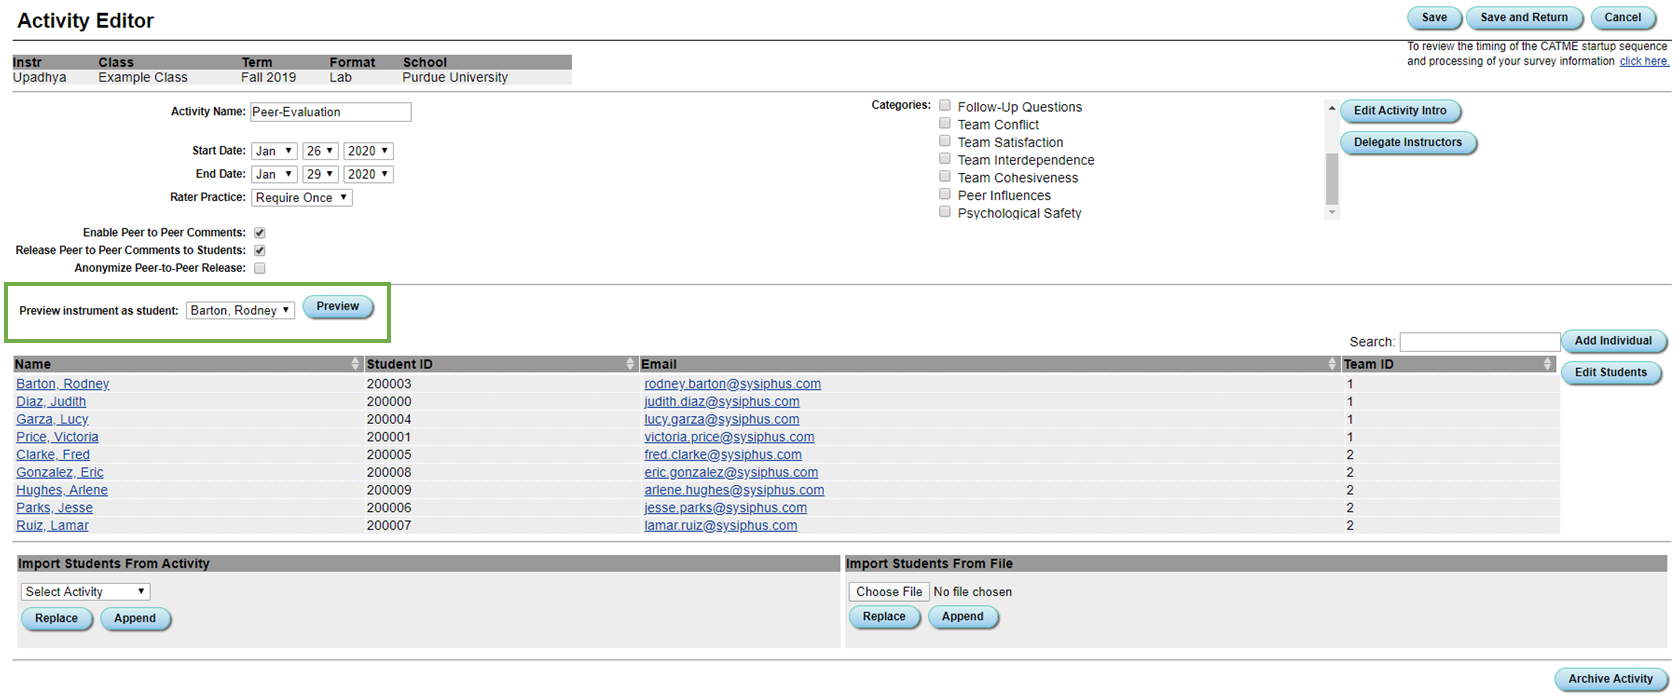
If you want to see how your survey looks from a student's perspective, you can choose what student you want to view your survey as and click the "Preview" button.

For information on how to add students during Survey Creation, visit the Creating and Editing Surveys help page.
There are two ways to add students after a survey is created.
The first way is to add an individual student via the "Add Individual" button found on the Survey Editor Page.

Input your student's information and select what team they will be in via the "Team ID" field. If you wish to place them in a new team, select "Other Specified Below" and input a new ID in the "Other Team ID" field that is not shared by an existing team. Then click "Save" or "Save and Return."

To add Multiple new students, the most effective way is to create a CSV file of your students and upload it here. You can find guidelines for the CSV file format in the technical documentation.
Once you are done formatting the CSV, click "Choose File" and select your document. Then click "Replace" (if you wish to replace existing students with the students in your file) or "Append" (if you want to add students and keep your existing ones). Please view the image below for reference.

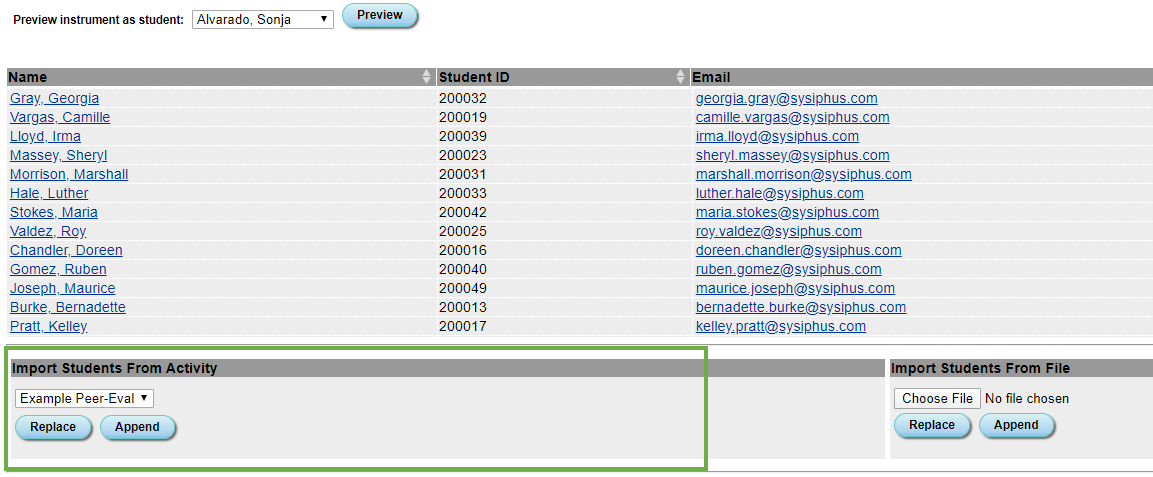
If you want to import students from a different survey, navigate to the bottom left corner of the Survey Editor. Here, please select the survey you want to import students from. Then click "Replace" (if you wish to replace existing students with the students in your file) or "Append" (if you want to add students and keep your existing ones). Please view the image below as reference.

After your students are added to your survey, you have the option to edit some of their information, as well as manage their access to the class.
To edit a specific student's information, navigate to the Survey Editor page and click on their name in the table at the bottom of the page.

This will take you to the Student Editor page displayed below.

To edit student information, simply delete the old information, type in the new information, and click "Save" or "Save and Return."
This page also allows you to perform the following actions via the three buttons in the bottom right corner:
Clicking this button removes the student and their answers from your survey. This does not delete their CATME account. It is possible to add a student back after deleting them, but their answers will be cleared and they will need to retake the survey.
Clicking this button will clear a student's answers from your survey. Once purged, your students' answers cannot be recovered and they will need to take the survey again.
Clicking this button will allow a student to re-enter the survey and change the answer.
Bulk student selection allows you to delete multiple students, clear the survey answers of multiple students, or allow multiple survey students to re-take your survey.
To access Bulk Student Selection, click "Edit Students" from the Activity Editor Page.

This will lead you to the page below. To select multiple students, click the boxes next to their names.

Once you have selected their names, click "Delete Students", "Purge Survey Answers", or "Allow survey re-entry" to delete multiple students, clear the survey answers of multiple students, or allow students to re-take your survey respectively.

NOTE: Once you delete a student, purge their answers, or allow them to re-enter the survey, you cannot undo your actions.
If you have TAs who have CATME student accounts, you can request a Dual-Access account by emailing licensing@catme.org.
If you are trying to add a TA who doesn't have a CATME student account, please have them request an Instructor Account, and mention the fact that he or she is a TA of your course in the Comments of the request form.
After your TA has an instructor account or a Dual-Access account, you will need to delegate them into your survey.